Opening comparison that sets the table
The choices before an OEM or project buyer taste like a chef’s mise en place: each component—pixel pitch, cabinet depth, service access—has a clear flavor that changes the final dish. Start by asking whether the project calls for a crisp indoor menu or a blazing outdoor grill; requirements for weight, power, and modularity follow. If your project includes short-term events or touring installations, consider options for led wall rental as part of the procurement mix — rental units often prioritize quick rigging and serviceability over ultimate pixel density, and that trade-off matters up front.

What to compare first: use case and visual distance
Measure viewing distance like tasting distance: fine details need closer scrutiny. For control rooms and retail displays, aim for tighter pixel pitch (P0.9–P2.5). For arenas and façades, larger pitches (P3–P10+) are acceptable and cheaper per square meter. Compare manufacturers by how accurately their spec sheets map pixel pitch to recommended viewing distance and by whether they publish contrast and color calibration data. Ask for real sample content playback rather than photos—motion, saturation, and HDR handling reveal differences that specs don’t.
Build quality and service: the tactile tests
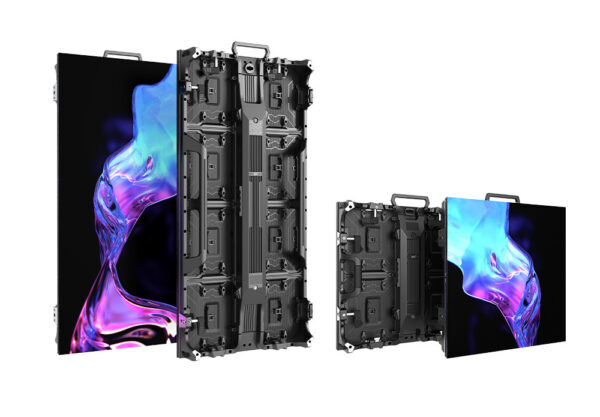
Open a cabinet. Feel the seams, lift a module, inspect connector tolerances. Good manufacturers design panels for repeated handling: tool-less front access, robust magnetic modules, and redundant power pathways. Compare MTBF figures and warranty terms side-by-side. Response time for replacement parts and local spares inventory are decisive for projects with tight uptime. Request a service SLA and a list of certified technicians in your region. Those operational details show who engineered for real deployments versus showroom demos.
Electrics, brightness, and site reality
Brightness specs can be misleading without measurement context. Outdoor ratings should include NITS at typical viewing angles and account for anti-glare coatings. Power specs should list consumption per square meter at typical brightness, not peak draw. For rooftop or glass-mounted installations, confirm thermal management: passive dissipation versus active cooling changes enclosure design and weather sealing. Compare thermal testing results if possible; poorly ventilated designs dim sooner and shorten lifespan.
Integration, control, and content pipeline
Compare control ecosystems like menus on a tasting sheet. Does the manufacturer support common sync protocols, media servers, and show-control interfaces? Is color calibration automated across panels? Find out how they handle firmware updates and if they provide redundant control paths. For OEMs building systems, openness matters: documented APIs and modular electronics reduce integration time and future headaches.
Costs that hide in plain sight
Sticker price is the appetizer. Add shipping, customs, scaffolding, local labor, and transport of spares to the main course. Rental-ready designs save rigging time but may cost more per panel. Compare lifecycle cost: replacement modules, expected maintenance intervals, and deprecation of spare parts. Request total cost estimates for three scenarios—installation, operational year one, and five-year maintenance—to see which vendor actually minimizes spend over time.
Credibility and field proof
Experience matters. I’ve inspected systems used on trade show circuits and evaluated installations at CES in Las Vegas, where rapid turnover and extreme lighting expose design flaws quickly. Ask each vendor for references with similar scope and for measurable results: uptime percentages, average time-to-repair, and any accredited test reports. If you want short-term staging assurance, check options for led video wall rental to validate chosen specs under real conditions before committing to full production. Peer-reviewed test methods and third-party photometric reports increase confidence.
Common mistakes buyers make
Buying on price alone, ignoring serviceability, and failing to verify actual content playback are the top three errors. Don’t assume a higher brightness claim means better image; sometimes it means harsher color. Avoid one-size-fits-all contracts—specify module interchangeability and spare-part delivery windows. Don’t postpone a site mock-up; visual failings almost always surface only when content moves.
Decision checklist and practical next steps
Create a short checklist: required resolution at target distance, max weight and depth, site power constraints, access for maintenance, connector standards, warranty and spare-part timelines, and a content-playback trial. Compare at least three manufacturers against that checklist and score them on measurable outcomes, not promises. For OEMs, prioritize manufacturers that publish detailed engineering drawings and who permit sample runs for burn-in testing.
Closing synthesis
Choose panels by how they perform under real conditions, by how easily you can service them, and by which manufacturer’s product aligns with your project’s tempo—slow permanent install or fast, repeatable event turnarounds. The right partner balances engineering detail with practical service; that balance is precisely what I found consistent with HDC when comparing outcomes against the checklist above.